How to Turn a Custom CurseForge Modpack Into a Minecraft Server (2026)
Maksym Savrei
Founder, Piggo
You built a custom CurseForge pack. It launches on your PC. Your friends want to play it together.
The tempting next step is to upload the /mods folder to a server and press Start.
Sometimes that works. Sometimes the server immediately crashes because a client-only mod is trying to load rendering code on a dedicated server. Sometimes a library is missing. Sometimes the loader version is wrong. And sometimes the server starts perfectly, but half of your custom recipes or progression are gone because the pack depended on configs, KubeJS scripts, datapacks, or other files that never made it to the server.
The important idea is simple: a CurseForge profile that works in singleplayer is not automatically a ready-to-run dedicated server pack.
This guide shows how to turn a custom CurseForge pack into a proper server without treating every crash as a RAM problem.
> Quick answer - Match the exact Minecraft and mod-loader environment, build a clean dedicated server, move the server-relevant mods and pack files across, remove confirmed client-only components, then start the server and fix the first meaningful error in the log. Do not start by randomly deleting mods or adding RAM.
What you need before you start
| Check | What to record |
|---|---|
| Minecraft version | The exact version used by the CurseForge profile, for example 1.20.1 or 1.21.1. |
| Mod loader | Forge, NeoForge, Fabric, or another loader. Do not mix them. |
| Loader version | Use the version the profile actually runs, not automatically the newest release. |
| Java version | Use the Java version required by that Minecraft/loader combination. |
| Installed profile files | The actual CurseForge instance, not only a screenshot of its mod list. |
| Server hardware | Enough RAM, a strong CPU, SSD/NVMe storage, and headroom for the OS/JVM. |
| Backup | If you are converting an existing world, copy it before testing the server build. |
A CurseForge export is not the same thing as a server pack
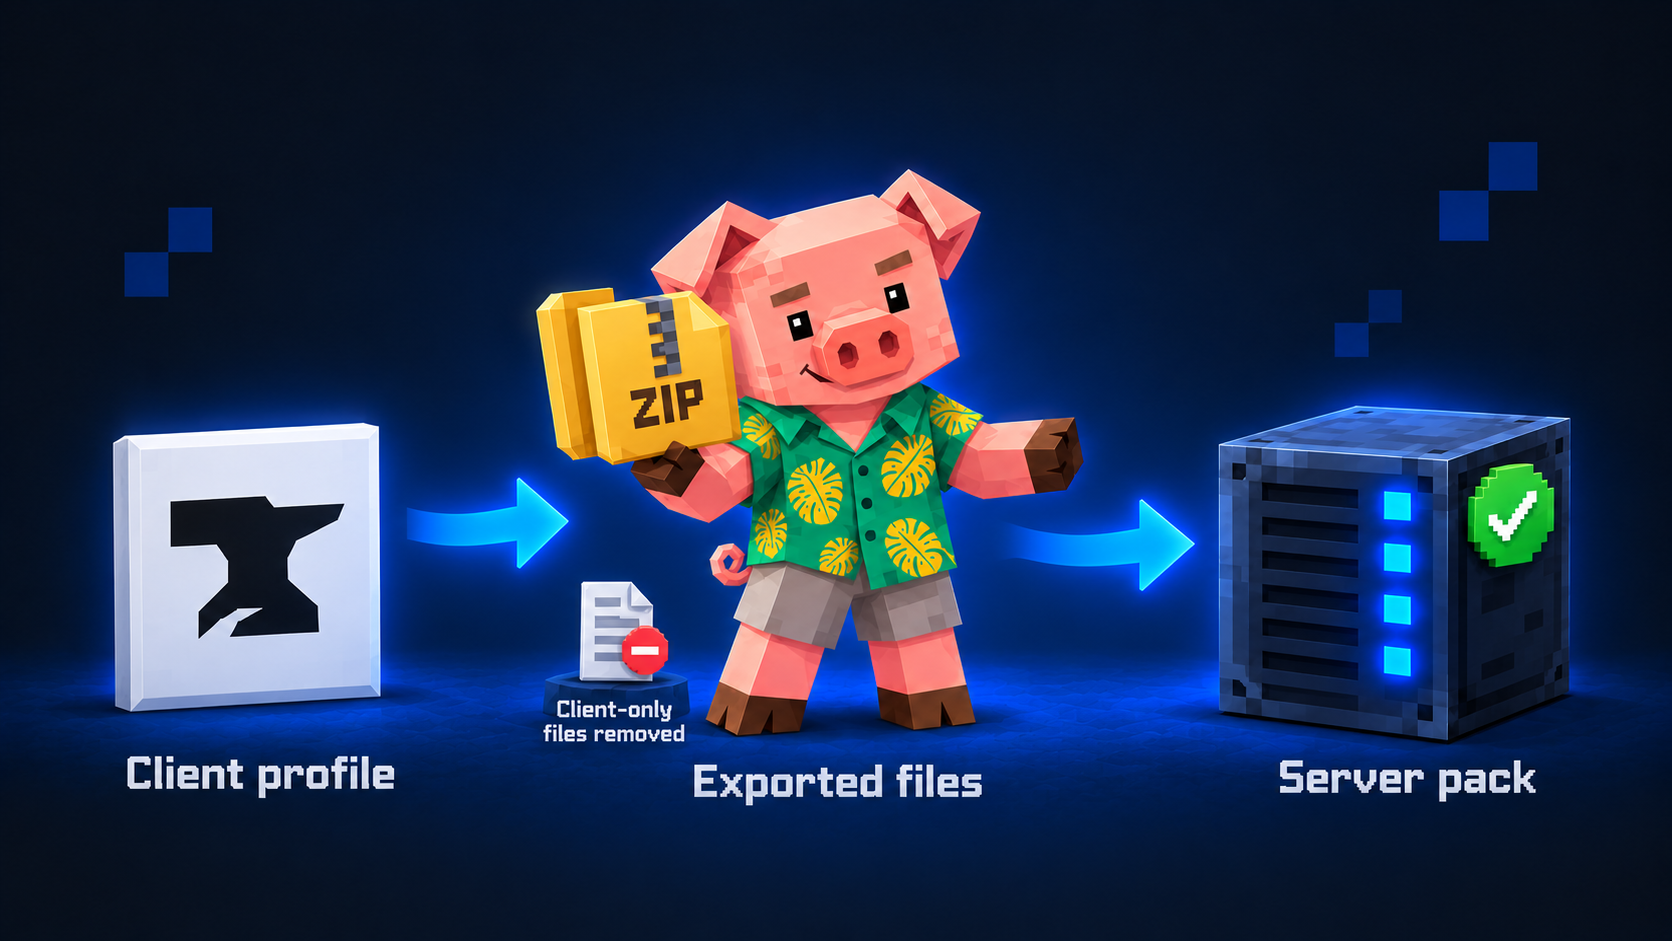
CurseForge can export a custom profile as a ZIP so another player can reconstruct the pack. The exported ZIP uses a manifest.json plus an overrides folder. CurseForge says overrides can contain configs, scripts, maps, saves, resources, mods, and other files the profile needs.
That export is useful, but it is primarily a way to share or reconstruct the profile. A dedicated server still needs the correct server-side loader installation and a set of files that can actually run on a physical server.
> Think of these as three different things - Client profile: everything a player needs to launch the pack. CurseForge export: the manifest and override files used to recreate/share that profile. Server pack: the dedicated-server installation with the correct loader, server-compatible mods, configs, scripts, datapacks, and world files.
Step 1: Match the exact Minecraft, loader, loader version, and Java version
Before touching the server, open the custom profile and write down the environment it already uses. A custom pack is a dependency graph. Changing the loader or Minecraft version while converting it into a server creates a second problem before you have solved the first one.
`
Example environment
Minecraft: 1.21.1
Loader: NeoForge
NeoForge: 21.1.x
Java: 21
`
Do not install "the latest Forge" or "the latest NeoForge" just because it is available. Match what the pack is already using unless you are intentionally updating and testing the entire pack.
Java must match as well. As examples, Forge 1.20.1 uses Java 17, while NeoForge documents Java 21 for Minecraft 1.20.5 through the 1.21 generation. Newer Minecraft releases can require newer Java versions. If the server dies before mods even load, checking java -version is a much better first step than changing memory settings.
Step 2: Build a clean dedicated server first
Install the dedicated-server version of the loader into an empty folder. Start it once before adding the custom pack. This gives you a known-good baseline: if the clean loader cannot start, there is no point debugging 150 mods yet.
NeoForge's own server guide follows this same basic workflow: install a server, start it, accept the EULA, then add the modpack contents. For pre-made packs, NeoForge recommends using an official server pack when one exists; otherwise, install a separate copy of the normal pack and move its contents into the server game folder, removing client-side mods where necessary.
Step 3: Why copying only your /mods folder is sometimes not enough
The /mods folder is important, but many custom packs are more than a collection of JAR files.
Depending on how you built the pack, server-relevant behavior may also live in folders such as:
- /config - mod configuration used by the pack
- /defaultconfigs - default server/world configuration used by some Forge/NeoForge packs
- /kubejs - custom recipes, tags, items, loot changes, events, and pack logic
- /scripts - CraftTweaker or other scripting systems
- datapacks or world datapacks - recipes, worldgen, tags, functions, progression, and other data-driven changes
- custom world or resource data - if the pack was intentionally built around it
If you only copy the mod JARs, the server can sometimes launch and still be wrong. Recipes may differ from the client. Progression gates can disappear. Items registered by pack scripts may not exist. A custom modpack is the behavior of the whole profile, not just the number of files in /mods.
KubeJS is a good example
KubeJS separates its logic by purpose. startup_scripts can register or modify items and blocks at startup. server_scripts commonly changes recipes, tags, loot tables, and server events. client_scripts is for client behavior such as UI or recipe-viewer integration.
That is why "my mod list matches" does not always mean "my pack matches."
Step 4: Remove client-only mods carefully
This is one of the most common reasons a custom pack works on a PC but crashes as soon as you put it on a dedicated server.
Singleplayer still runs inside the physical Minecraft client. The game spins up a logical server for the world, but all the client-side classes still exist in the same program. A dedicated server is different: rendering and other client-only classes are not present.
NeoForge specifically warns that calling client-only classes on a physical server leads to missing-class errors and crashes. It also notes that NoClassDefFoundError and ClassNotFoundException caused by incorrect client/server separation are among the common dedicated-server failures.
Fabric has the same concept: mods can declare that they run on the client, server, or both. A Fabric mod marked for the client environment should not be loaded as a dedicated-server mod.
Typical client-only categories
- shader and rendering features
- purely visual animation or model changes
- HUD and UI mods
- some minimaps and client map features
- client-only performance/rendering mods
- keybind-only utilities
But do not delete mods only because the name sounds visual. Some projects include both client and server behavior in the same JAR, and some client utilities are designed to safely do nothing on a server. Check the mod page or loader metadata when possible, and remove only what you can identify with confidence.
> A useful rule - Singleplayer success proves that the pack can run a logical server inside the client. It does not prove that every mod in the profile is safe on a physical dedicated server.
Step 5: Keep the dependencies intact
A lot of custom-pack failures come from removing something that looked unimportant.
Mods can declare hard dependencies and version ranges. Forge checks declared dependencies before loading; Fabric Loader likewise resolves required dependencies and can refuse to launch when they are missing or incompatible.
This is why you should not "clean up" the server by deleting every library mod with a boring name. A content mod may depend on an API, language library, configuration library, animation library, or compatibility module that appears to do nothing by itself.
When the server says something like:
`
Mod examplemod requires librarymod 4.2.0 or later
Currently, librarymod is not installed
`
believe the loader. Fix that dependency first instead of adding RAM or changing five unrelated mods.
Step 6: Start the server and read the first real error
The first startup is not supposed to be a guessing game.
If the server fails, avoid changing several things at once. Find the earliest meaningful loader or exception message, fix that root problem, then start again. One broken mod can create dozens of follow-on messages below it, which makes the bottom of a crash log look much more complicated than the actual cause.
Common custom-modpack server errors
| Error | What it usually means |
|---|---|
| NoClassDefFoundError: net/minecraft/client/... | A mod is likely touching client-only Minecraft code on the dedicated server. Identify the mod named around the error and check whether it belongs on the server. |
| Attempted to load class ... for invalid dist DEDICATED_SERVER | Same category: something is loading a client-only class on the physical server. This is not a RAM problem. |
| Mod X requires Y | A required dependency is missing, the wrong version is installed, or you removed a library when building the server pack. |
| Mod ... requires Forge/NeoForge/Fabric ... | The loader or loader version does not match what the mod expects. Match the original pack before attempting upgrades. |
| UnsupportedClassVersionError or Java startup failure | The server is using the wrong Java major version. Check java -version and the requirement for that Minecraft/loader version. |
| Duplicate mod / duplicate mod ID | Two copies or two versions of the same mod are being loaded. Remove the duplicate rather than changing memory. |
| Server launches, but recipes/progression are wrong | Check configs, KubeJS, scripts, datapacks, and other override files. A matching mods folder alone may not reproduce the pack. |
A practical workflow: custom CurseForge pack to dedicated server
- Duplicate or export the profile. Keep a clean copy of the working client pack. If you use CurseForge Share Profile, include the relevant configuration and pack files so you have a reproducible snapshot.
- Record the environment. Write down Minecraft, Forge/NeoForge/Fabric, the loader version, and Java version before changing anything.
- Install a clean dedicated server. Use the matching loader in an empty directory. Start it once and accept the EULA.
- Move the pack contents. Bring over the server-relevant mods and any pack folders the profile actually depends on: config, scripts, KubeJS, datapacks, and other overrides.
- Remove confirmed client-only components. Do this carefully. Prefer an official server pack or mod documentation when available rather than guessing from filenames.
- Start the server. Read the first real error. Fix one root cause at a time.
- Join with the exact client profile. Do not test with a "similar" mod list. Use the actual pack version your friends will use.
- Back up before changing the pack. Once the server is working, take a world/server backup before adding, removing, or updating mods.
How much RAM does a custom modpack need?
There is no reliable rule such as "100 mods = 6 GB" or "300 mods = 12 GB." Mod count is a weak proxy for actual server load.
A smaller pack with heavy world generation, dozens of entities, automation, and several dimensions can be harder to host than a much larger pack full of lightweight libraries and client features.
What matters more is:
- how many players are online at once
- whether those players explore together or generate terrain in different directions
- how much custom world generation the pack adds
- automation, farms, mobs, storage networks, and chunk loading
- how old and developed the world has become
- the CPU performance of the server, not just the RAM number
If you want concrete examples, Piggo's guides for Craftoria and All the Mods 10 show why two large packs can have different practical sizing considerations even when both contain hundreds of mods.
Signs RAM probably is not the reason your custom pack is lagging
It is very easy to see a laggy modded server and immediately buy more memory. That only helps when memory pressure is actually the bottleneck.
Look somewhere else first if:
- the server has free memory but lag appears when players enter new terrain
- performance becomes bad only around one factory or mob farm
- the server starts fine but tick performance gets worse as automation grows
- increasing the memory limit does not materially change the same lag
- the crash log is explicitly naming a missing class, dependency, mod, loader, or Java error
A dependency failure will not be fixed by another 4 GB. A client-only mod will not become server-compatible because the heap is larger. And a CPU-heavy factory still has to be processed every tick.
What changes when you update your custom pack?
Once the server works, the custom pack becomes something you have to maintain.
When you add, remove, or update mods on the client profile, think about the server as a second copy of the same product. The server and players need compatible versions of the content that matters to networking and game state, and pack-level scripts/configuration may need to change at the same time.
Before a pack update:
- back up the world and the working server directory
- record the old pack version or export a snapshot
- update the client and server deliberately rather than one side at a time
- read mod changelogs when removing or replacing mods that add blocks, items, dimensions, or worldgen
- test the update before letting the whole friend group reconnect
Removing a world-content mod from an existing server deserves much more caution than removing a minimap. If a mod owns blocks, entities, dimensions, or saved data in the world, treat removal as a migration rather than simple cleanup.
Do you actually need to make a server pack yourself?
If the modpack author already publishes a dedicated server pack, use it. It usually exists specifically to remove client-only components and package the correct server-side files for you.
The harder case is the one this guide is about: you built the pack yourself, or you have a private CurseForge profile that was never designed as a public server pack.
That is also where managed hosting is useful. With Piggo, you can send us the custom pack you actually want to play. We can help turn the client profile into a working server-side setup, rather than giving you an empty panel and asking you to figure out which JAR is crashing NeoForge.
The short version
A custom CurseForge modpack becomes a reliable dedicated server when you preserve the pack's actual environment and remove the assumption that "the mods folder is the pack."
Match the Minecraft and loader versions. Use the correct Java. Install a clean server. Bring over the mods plus the configs/scripts/datapacks the pack depends on. Remove confirmed client-only mods. Then read the first startup error instead of changing everything at once.
If it already works in singleplayer, you are not starting from zero. You just need to turn a client profile into something a physical dedicated server can actually run.
Sources
Frequently asked questions
Modded Minecraft hosting, managed
- 48-hour free trial, no card needed
- 1-hour fix guarantee, 08:00-22:00 Amsterdam time
- Daily offsite backups, kept 7 days
Related articles

How Much RAM Does All the Mods 10 Need? Server Requirements for ATM10 (2026)
Hosting All the Mods 10 with friends? Practical RAM guidance for 2-10 players, plus CPU, chunk generation, late-game automation, pregeneration and setup advice for ATM10 8.2.
How Much RAM Does Craftoria Need? Server Requirements & Setup (2026)
Hosting Craftoria with friends? See practical RAM recommendations for 2-10 players, CPU requirements, chunk-generation considerations, and how to set up Craftoria 1.37.0.
How to Cancel Your Piggo Subscription
Three clicks in the billing portal, no notice period and no fee. Here is exactly where to click, and what happens to your world.